Materials

Above:
Author’s workspace.
Let’s start from the very basics. Our workspace. All some people need is a steady table, a simple light and a comfortable chair. Others, for various reasons, paint onto the kitchen table along with our beloved other halves. The luckiest have a dedicated room or at least a big portion of a room all for them. Whatever the case might be, go for a steady, large enough table, 1 or 2 good light bulbs and a comfortable chair.
Let there be light. Light is one important aspect in all kids of modeling but it becomes so important for flat figure painting, that a wrong light, or a constantly altering light source can destroy days of painting. Daylight, but not direct sun light is a blessing but since most of us have a real life other than figures, most of the painting will take place during the night. Day light bulbs are a good option in this case. It is important to remember that normal incandescent bulbs have a yellowish-orange hue, fluorescent lamps are closer to green spectrum while iridescent ones tends towards purple or blue. We can always compensate with our painting but its better to solve this problem from the beginning. Also stick to the same kind of light and from the same direction (see also painting chapter) from the start to the finish of a figure or a group of figures if they are destined to be displayed together.
In some point or another you will most probably need a kind of magnifier to add small details or simply to paint everything because age plays its role. Most of the painters are using an optivisor, a kind of magnifier that you can wear it much like a hat. It has 2 advantages. It let you hands free giving freedom of movement during painting and gives good laughs for the family when they look at you. You can of course use any kind of magnifying device as long as you feel comfortable with it.
Moving to tools, a scalpel with changeable blades is maybe the single most important and very cheap tool someone can have. Due to profession I have used all kinds of blades, each of them have a number that denotes its shape and size. The most useful one is No 11, the one with a straight edge ending to a sharp tip. It’s an all purpose tool that besides the obvious use of cutting, it cleans flash from figure’s edge, or engraves some detail lost from the cleaning. Its use is limited only by lack of imagination.
Files are the next most useful, simple tool that we have in our disposal. Don’t be cheap when buying them. Choose the smallest, expensive ones that jewelers or watchmakers use. Buy 4-5 different shapes, triangular, round, flat and mouse tail. They won’t last forever but surely last long enough to worth the investment. Replace when they start clogging from metal residues. Remember that metal residues can be cleaned with an iron brush easily.
A small iron saw, precision tweezers, a pair of scissors, an iron ruler, pins and paper clips, a small hand drill or any other simple tool someone might think can be stored easily in case they are needed. Some form of strong glue like a cyanoacrylate type can be used for gluing parts, rarely, or attaching the figure to the base or frame. Left: A selection of simple, cheap tools. These are more than enough for flat figures. Dremel power tool is a luxury but once you get it, you can’t live without it.
A personal favorite tool, although rather exotic for flat figures is a power mini drill. I had bough a really good one some years ago from Dremel and is so good and with so many accessories for sanding, cutting, engraving drilling and such which I’m sure it will accompany me till the end.
We will deal with brushes, airbrushes, paints and painting mediums at the appropriate chapter. All I can say here is DON’T be cheap with paints and brushes. ALWAYS buy the most expensive ones. Good paints and brushes can make our painting sessions a nightmare or the most enjoyable experience.

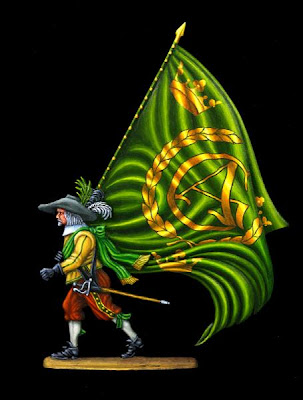
Above:
Serge Franzoi's Swedish Banner.
No comments:
Post a Comment